Total Pageviews

Sunday 14 October 2018

NodeJS - Setup a HTTP / Local Web Server using custom port

We can run our web application on custom port which can be provided by the developer, here we can check that that the provided port is working on not.

Pre-requiste Installation
NodeJS

1.     Install npm install express
2.     Create server.js file
var express = require('express');
var app = express();
app.use(express.static(__dirname + '/www'));
app.listen('3000');
console.log('working on 3000');
3.     In parallel root folder, create www folder
4.     Put index.html or application folder inside www folder, refer below image: 


5. Start server by typing node server.js in command prompt.

6. open     localhost:3000 and index.html code will execute.

Happy Coding :)


NodeJS - Setup a HTTP / Local Web Server

Sometimes we need to test our web application on different devices before deploying it on actual production server, as we need to be sure that application is working properly and we can get time to fix any UI related issues.

To resolve this issue we can setup a localhost server using NodeJs. I have listed down few steps to setup a simple HTTP server or local web server.

  1. Download and install NodeJS from https://nodejs.org.
  2. Run npm install -g http-server 
  3. Go to the path where application folder exists with index.html from command prompt.
  4. Run http-server command from command prompt.
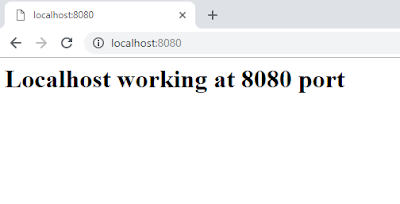
  5. Open browser and run http://localhost:8080 and you should see your local website as mine.


Happy Coding :)

Wednesday 10 October 2018

ANGULARJS: $HTTP

$http is a service for reading data from web services (data servers). The AngularJS $http service makes a request to the server, and returns a response.

Today I am going to show a very simple way to load external JSON file in AngularJS 1 :

Sample json file : data.json

{
"Person": [
{
"Name": "Swati",
"Location": "Office"
},
{
"Name": "John",
"Location": "Home"
}
]
}


index.html

<!DOCTYPE html>
<html>
<head>
<meta http-equiv="Content-Type" content="text/html; charset=" utf-8" />
<meta name="viewport" initial-scale="1.0" content="width=device-width" user-scalable="yes" />
<title>Load External JSON</title>
<script src="libs/angular.min.js"></script>
<script src="controller/loadController.js" type="text/javascript"></script>
</head>
<body ng-app="loadJsonPrj" ng-controller="LoadJsonCtrl">
<button type="button" ng-click="loadJson()"> Load External JSON </button>
<ul>
<li ng-repeat="data in getResponse">{{ data.Name+ ', ' + data.Location}}
</li>
</ul>
</body>
</html>


loadController.js

var myApp = angular.module('loadJsonPrj', []);

function LoadJsonCtrl($scope, $http) {
$scope.loadJson = function() {
$http.get('data.json').then(function(response) {
$scope.getResponse = response.data.Person;
console.log($scope.getResponse);
}, function(response) {
$scope.getResponse = "Something went wrong";
});
}
}
myApp.controller('LoadJsonCtrl', LoadJsonCtrl);


Output:

Happy Coading :)

Monday 17 September 2018

Simple Table ADD/DELETE Row in AngularJS 1


I have created a simple demo to show how to add and delete a table row dynamically in AngularJS 1.

Please don't mind my HTML view, as this demo is totally focuses on functionality.
HTML
<!DOCTYPE html>
<html lang="en">
   <head>
      <meta charset="UTF-8">
      <meta name="viewport" initial-scale="1.0" content="width=device-width" user-scalable="yes"/>
      <title>Simple Table Manipulation with AngularJS</title>
      <link rel="stylesheet" href="css/main.css"/>
      <script src="libs/angular.min.js"></script>
      <script src="controller/app.js"></script>
   </head>
   <body ng-app="tableManipulation" ng-controller="TableManipulationCtrl">
      <div>
         <form name="userForm">
            <span>Create Table</span>
            <div class="form-style">
               <label>First Name </label><input type="text" placeholder="First Name" ng-model="f_name" required/>
            </div>
            <div class="form-style">
               <label>Last Name </label><input type="text" placeholder="Last Name" ng-model="l_name" required/>
            </div>
            <div class="form-style">
               <label>Age </label><input class="inp-style" type="number" placeholder="Age" ng-model="age" required/>
            </div>
            <div>
               <button type="button" ng-click="userForm.$valid && onAddRow()">Add Row</button>
               <button type="button" ng-click="onDeleteRow()">Delete Row</button>
            </div>
         </form>
      </div>
      <table class="user-table">
         <tr>
            <th>
               First Name
            </th>
            <th>
               Last Name
            </th>
            <th>
               Age
            </th>
         </tr>
         <tbody>
            <tr ng-repeat="rows in user_rows">
               <td>{{rows.f_name}}</td>
               <td>{{rows.l_name}}</td>
               <td>{{rows.age}}</td>
            </tr>
         </tbody>
      </table>
   </body>
</html> 

AngularJS + Javascript

angular.module("tableManipulation", []).controller('TableManipulationCtrl', ['$scope', function($scope){
    $scope.user_rows = [];
   
    $scope.onAddRow = function(){
       
      $scope.user_rows.push({
            f_name: $scope.f_name,
            l_name: $scope.l_name,
                  age: $scope.age
        });
       
         $scope.clearFields();
    }
   
    $scope.onDeleteRow = function(){       
       $scope.user_rows.pop();
        $scope.clearFields();       //scope level function calling
    }
   
    $scope.clearFields = function(){
        $scope.f_name ='';
        $scope.l_name ='';
        $scope.age ='';
    }
}]);

CSS


table, th, tr {
    border: 1px solid black;
    border-collapse: collapse;
}

div {
    border-radius: 5px;
    background-color: #f2f2f2;
    padding: 10px;
    width: 50%
}

.inp-style{
    margin-left: 42px;
}

Result


Saturday 15 September 2018

AngularJS 1.x vs Angular 2


As we all know that Angular 2 is not an extended version of Angular 1, It’s completely rewritten.
Hence I have tried to summarize the differences here:

AngularJS 1.x
Angular 2
Written in JavaScript
Written in Typescript
Built without mobile support in mind but that doesn’t mean mobile application cannot be build using Angular 1.  
Built with mobile-oriented approach first.
Angular 1 uses a “Controller” based approach.
In Angular 2 “Controllers” are replaced with “Components” based approach.
Angular 1 uses “$scope” concept
“$scope” has been removed from this version and above.
Uses “ng-repeat”
“ng-repeat” changed as “*ngFor” i.e. structural syntax change
Angular 1 provides only has ES5, ES6, and Dart languages support
Angular 2 code can be written in any of the language from ES5, ES6, Typescript or Dart.
Angular 1 is easy to set up, we only need to include the library reference.
Angular 2 requires “Angular CLI” to create angular 2 applications.
AngularJS 1.x versions are suffixed with “JS”
As Angular 2 is complete rewrite hence angular 2 is called as just angular and follows a semantic version approach for versioning such as Angular 2/4/5.
Local variables are defined using “let”
Local variables are defined using “#”
No uses of camelCase syntax, ex: ng-class, ng-model
Uses camelCasing ex: ngClass, ngModel
In AngularJs 1 HTML DOM element properties and events can be accessed by “ng-href, ng-src, ng-hide and ng-click”

For ex :
<button ng-click="toDo()">
Angular 2 directly uses the valid HTML DOM element properties and events such as “href, src, hidden, and click” etc

For ex :
<button (click)="toDo()">
For one way data binding “ng-bind”

Ex:
<input ng-bind="inputText.name"></input>
One way data binding is achieved via wrapping the properties with square brackets.

Ex:
<div style.color]="color">text me</div>
For two way data binding ng-model is used
For two way data binding [(ngModel)] is used
In AngularJS 1.x, we can define a service via 5 different ways.

Factory
Service
Provider
Constant
Values
In Angular 2, a class is the only way to define a service.
To bind an image/property or an event with AngularJS, you have to remember the right ng directive.
Angular focuses on “( )” for event binding and “[ ]” for property binding.
AngularJS uses $routeprovider.when() to configure routing
Angular uses @RouteConfig{(…)}.
In Angular 1 there was no guarantee that a parent node would always be checked before a child node. This made it difficult for the change detection mechanism to traverse all the nodes without falling in a circular loop.
In Angular, changes are guaranteed to propagate unidirectionally. The change detector will traverse each node only once, always starting from the root. That means that a parent component is always checked before its children components.
Angular 1.x has 2 ways to bootstrap angular. One using ng-app attribute and other via code.

<script>
   angular.element(document).ready(function() {
      angular.bootstrap(document, ['myApp']);
   });
</script>
In Angular 2, The only way to bootstrap angular is via code.

import { bootstrap } from 'angular2/platform/browser';
import { ProductComponent } from './product.component';

bootstrap(ProductComponent);
AngularJS 1.X will continue to reside at angularjs.org
Angular 2.0 will be hosted at angular.io.

Ways of Dependency Injection syntax is changed, as everything is class in Angular, so DI is achieved via constructor.
Not SEO friendly
SEO friendly

Angular 2 has little backward compatibility, i.e. Application written in Angular 4 can also work with Angular 2

Angular 2 has child routing feature i.e. the whole application can be divided into mini-applications and each mini-application having its own routing feature.

I hope this will help. J


Microsoft Logo using flexbox and Reactjs

 <!DOCTYPE html> <html> <head>     <script src="https://unpkg.com/react@18/umd/react.development.js" crossori...