Required
- Download Nodejs from https://nodejs.org/en/download/
- Code Editor - VS Code or whichever suits
Install ReactJS in two ways
- By using web pack and babel.
- By using the “create-react-app” command
By using web pack and babel:
It is a very lengthy process because you have to remember a list of packages.
- Web pack: It is a module bundler which manages and loads required independent modules and compiles them to a single bundle file called bundle.js file.
- Babel: It is a JS compiler and transpiler, used to convert new ES6 features code into plain old ES5 which can be understood by all browsers.
Let’s create an app using web pack and Babel
- Create an application directory "testApp" and cd testApp into it. Now we are inside E:\ testApp
- npm init –y and finish the process, -y is used to avoid questions which will be asked by command line while installing npm
- package.json should get created inside “testApp” directory and should look like below :
{
"name": "testApp",
"version": "1.0.0",
"description": "",
"main": "index.js",
"scripts": {
"test": "echo \"Error: no test specified\" && exit 1"
},
"keywords": [],
"author": "",
4. Install npm install react react-dom
5. Install webpack using below command
npm install --save-dev webpack webpack-dev-server webpack-cli
This command will install list of packages which are listed below:
webpack – All core functionality of webpack
webpack-cli – To use webpack from command line e.g. starting dev server, creating a production build
webpack-dev-server - minimal server for client-side development, automatically run webpack if file’s content change
webpack – All core functionality of webpack
webpack-cli – To use webpack from command line e.g. starting dev server, creating a production build
webpack-dev-server - minimal server for client-side development, automatically run webpack if file’s content change
6. Update ‘package.json’
"start": "webpack-dev-server --mode development",
"build": "webpack --mode production",
7. Install babel using below command
npm install --save-dev @babel/core @babel/preset-env @babel/preset-react babel-loader
This command will install list of packages which are listed below:
- babel-core – main engine for its dependents
- babel-preset-env – supports ES5, ES6
- babel-preset-react - latest JS syntax support
- babel-loader – required for communication between Webpack and Babel
8. Create a file .babelrc inside E:\testApp
9. Inside .babelrc file write
{
"presets": [
"@babel/preset-env",
"@babel/preset-react"
]
}
10. Create a file webpack.config.js inside E:\testApp
11. Inside webpack.config.js file write
module.exports = {
entry: './src/index.js',
output: {
path: __dirname + '/dist',
publicPath: '/',
filename: 'bundle.js'
},
devServer: {
contentBase: './dist',
},
module: {
rules: [
{
test: /\.(js|jsx)$/,
exclude: /node_modules/,
use: ['babel-loader']
}
]
},
devtool: 'inline-source-map',
};
12. Create index.html
13. Create a src folder inside E:\testApp
14. Create index.js inside src folder (E:\testApp\src)
15. Change the build output and development contentBase from ‘./dist’ to ‘./build’ in our webpack.config.js
16. install a new Webpack plugin named HtmlWebpackPlugin
npm install html-webpack-plugin –D
The index.html is main file and its content changes as per the update inside the application, to achieve this (‘html-webpack-plugin’) is being used which is imported inside webpack.config.js
Concluded all the parameters here
const path = require('path');
const HtmlWebpackPlugin = require('html-webpack-plugin');
module.exports = {
entry: './src/index.js',
output: {
path: __dirname + '/dist',
publicPath: '/',
filename: 'bundle.js'
},
devServer: {
contentBase: './build',
},
module: {
rules: [
{
test: /\.(js|jsx)$/,
exclude: /node_modules/,
use: ['babel-loader']
}
],
},
devtool: 'inline-source-map',
plugins: [
new HtmlWebpackPlugin({
template: path.resolve('./index.html'),
}),
]
};
17. In the index.html
<!DOCTYPE html>
<html>
<head>
<title>My React Environment Setup</title>
</head>
<body>
<div id="root"></div>
</body>
</html>
The div with the id “root” is the main container, inside this all the application content will reside.
18. In the index.js
import React from "react";
import ReactDOM from "react-dom";
class TestApp extends React.Component {
render() {
return <h1>Hello World from React</h1>;
}
}
ReactDOM.render(<TestApp />, document.getElementById("root"));
19. Update the “scripts” in package.json
"scripts": {
"start": "webpack-dev-server --mode development",
"build": "webpack --mode production",
},
"scripts": {
"start": "webpack-dev-server --mode development",
"build": "webpack --mode production",
},
20. Run “npm run build” inside E:\testApp to check config and this command will generate index.html file in the same directory where our bundle.js is created by Webpack.
21. Run “npm run start” inside E:\testApp to run the application
“webpack-dev-server — mode development — open — hot” means application will open in development mode(mode development) in your default browser(-open) and watch for any changes made to application (-hot)
P.S. you can download source code from Github
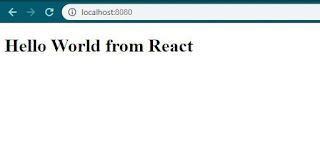
Result:


Thanks for posting such a Useful information .You have done a great job.
ReplyDeleteReact JS Online training
React JS training in hyderabad